
Installing Door Edge Guards: Easy Way to Prevent Dings
- STGN Official
- Jun 24, 2025
- 3 min read


Every time you swing open your car door in a tight parking spot, you risk chipping paint or causing minor dents—often without even noticing. Installing door edge guards is a simple and affordable solution that helps protect your vehicle’s edges from everyday dings. Whether you drive a compact or a full-size SUV, this easy DIY upgrade can extend the life of your paint job and boost your car’s resale value. In this guide, you’ll learn why door edge guards matter, how to choose the right one, and how to install them in minutes.
Table of Contents
1. Highlights / Overview
1. Prevents Door Dings
Description: Protects paint and metal from minor impacts.
Why it matters: Reduces costly bodywork repairs.
Quick Tip: Ideal for narrow parking spaces or urban areas.
2. Preserves Resale Value
Description: Keeps car looking newer, longer.
Why it matters: Clean doors = higher perceived value.
Quick Tip: Buyers notice even minor damage.
3. Easy to Install
Description: Most options are peel-and-stick or slide-on.
Why it matters: No need for tools or a pro.
Quick Tip: Install in under 10 minutes per door.
4. Affordable Upgrade
Description: Most sets cost $10–$30.
Why it matters: High ROI on a small investment.
Quick Tip: Buy a multi-pack for all four doors.
5. Comes in Various Styles
Description: Transparent, chrome, rubber, or carbon-look.
Why it matters: Can match or enhance your car's look.
Quick Tip: Transparent guards are nearly invisible.
2. In-Depth Breakdown
H2: What Are Door Edge Guards?
Definition: Narrow strips of protective material that attach to the vertical edge of a car door.
Benefits:
Prevent paint chips and minor dents.
Provide buffer in tight parking conditions.
Tips:
Look for guards with strong adhesive or built-in grip.
Choose flexible material to fit curves and contours.
H2: Why They Matter
Function: Acts as a barrier between your door and other objects like walls, poles, or other cars.
Benefits:
Helps maintain aesthetic appeal.
Reduces need for touch-up paint or dent repair.
Examples:
Great for families with kids or frequent city drivers.
H2: Types of Door Edge Guards
Peel-and-Stick Vinyl/Rubber Guards:
Easy install, often transparent or black.
Clip-On/Slide-On U-Channel Guards:
Fits over edge, no adhesive needed.
Custom-Fit OEM-Style Guards:
Designed for specific models, usually more subtle.
3. Practical Tips & Tools
What You Need:
Clean cloth, alcohol wipes, sharp scissors or blade.
(Optional) Hairdryer for adhesive flexibility.
Time/Money Hacks:
Buy universal guards for multiple vehicles.
Install during warm weather for better adhesive bond.
4. Implementation Guide
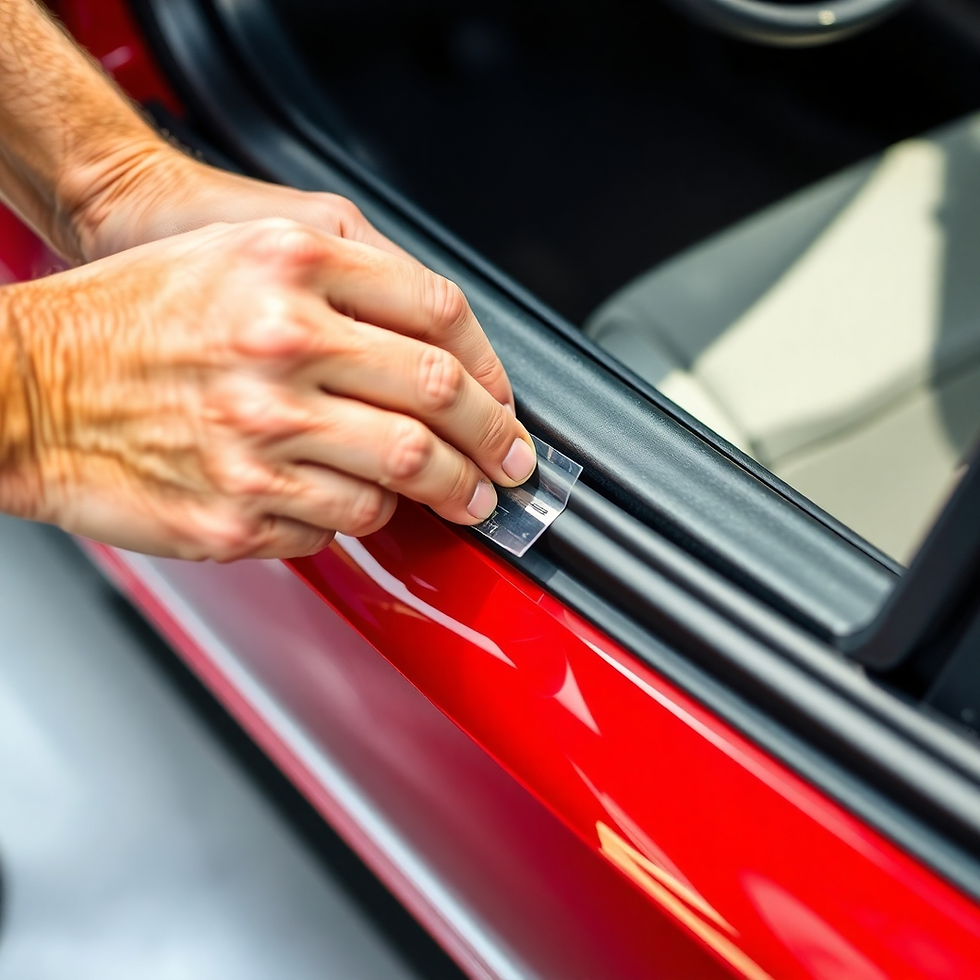
Step-by-Step Installation:
Clean door edges thoroughly with alcohol wipes.
Measure and cut the guard to match door length.
Peel backing (if adhesive type) and press onto edge.
For U-channel types, press firmly along the entire edge.
Check alignment and smooth out any bubbles.
Common Pitfalls to Avoid:
Installing on a dirty surface (reduces adhesion).
Using guards in cold temps (adhesive won’t bond well).
Not trimming corners—can cause peeling later.
5. Sample Plan / Itinerary (DIY Weekend Upgrade)

1. Prep Time (15 minutes):
Gather materials and clean all door edges.
2. Install Front Doors (30 minutes):
Measure and apply guards carefully.
3. Install Rear Doors (30 minutes):
Match front side style and finish.
4. Post-Install Check (10 minutes):
Open/close doors to confirm no interference.
5. Bonus Touch-Up (Optional):
Wax the area around the edges for a polished look.
Insider Tip: Use a heat gun or blow dryer to curve the guards around complex corners.
6.FAQ
Q1. Will door edge guards damage my paint?A: No, most are designed to be paint-safe and removable.
Q2. Are they weather-resistant?A: Yes, quality guards are UV- and weather-resistant.
Q3. Can I use them on older vehicles?A: Absolutely—they’re great for preserving aging paint.
Q4. What if I want to remove them later?A: Use a heat gun and adhesive remover—no damage if done carefully.
Q5. Do dealerships install these?A: Some offer OEM options, but you can easily DIY for less.
7. Call to Action : Installing Door Edge Guards
Try installing door edge guards this weekend and see the difference in how your car handles daily wear. It's a small step that delivers long-term protection—and peace of mind. Let us know how it works for you!


Comments